> ## Documentation Index
> Fetch the complete documentation index at: https://help.hivra.app/llms.txt
> Use this file to discover all available pages before exploring further.
# Using the Composer to Build and Publish Posts
> A complete walkthrough of the Composer: selecting accounts, uploading video, writing captions, setting thumbnails, and choosing how to publish.
The **Composer** is the full-screen workspace where every publish job in Hivra begins. You open it by clicking **New Post** in the dashboard sidebar. Hivra persists your Composer session locally, so your work is saved automatically as you go — closing the Composer during file upload will not erase your progress.
## Opening the Composer
Click **New Post** in the sidebar. If you have an in-progress draft, Hivra will restore it automatically so you can pick up where you left off.
## Selecting connected accounts
In the **Posting To** section, Hivra displays a tile for every connected account in your workspace. Toggle the tiles for the platforms you want to target — YouTube, Instagram, TikTok, Facebook, X, and Threads.
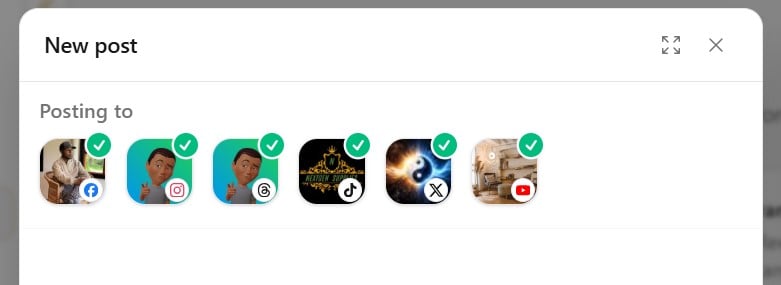 Only accounts you have already connected in **Integrations** will appear here.
## Uploading video files
Drag one or more MP4 or MOV files into the Composer, or click the upload area to open a file picker. Each file you drop is added to the **upload dock** — the progress strip at the bottom of the screen that shows transcode and upload status for every file in the current session.
If a file fails to transcode, check that it uses a supported codec. MP4 (H.264) and MOV are the recommended formats for all platforms.
## Writing captions
### Baseline caption
Type your caption in the main text field. This becomes the default caption that every selected platform inherits. Use it for copy that works everywhere, then override it per platform where needed.
### Per-platform caption overrides
Expand any platform drawer to write a caption that applies only to that destination. Platform-specific captions replace the baseline caption for that platform; other platforms are not affected.
Caption character limits differ by platform. Hivra shows a live character count inside each platform drawer so you can stay within the limit.
### Saved hashtags
The **Saved Hashtags** button () in the caption toolbar lets you insert pre-built hashtag sets with a single click — useful for saving favorite hashtags and reusing them across composer sessions.
### Emoji picker
Click the emoji icon () in the caption toolbar to open the emoji picker and insert an emoji at the cursor position. The picker works in both the baseline caption field and individual platform caption fields.
## Thumbnail selection
The thumbnail rail on the left of the composer allows you to set a thumbnail for your video.
Only accounts you have already connected in **Integrations** will appear here.
## Uploading video files
Drag one or more MP4 or MOV files into the Composer, or click the upload area to open a file picker. Each file you drop is added to the **upload dock** — the progress strip at the bottom of the screen that shows transcode and upload status for every file in the current session.
If a file fails to transcode, check that it uses a supported codec. MP4 (H.264) and MOV are the recommended formats for all platforms.
## Writing captions
### Baseline caption
Type your caption in the main text field. This becomes the default caption that every selected platform inherits. Use it for copy that works everywhere, then override it per platform where needed.
### Per-platform caption overrides
Expand any platform drawer to write a caption that applies only to that destination. Platform-specific captions replace the baseline caption for that platform; other platforms are not affected.
Caption character limits differ by platform. Hivra shows a live character count inside each platform drawer so you can stay within the limit.
### Saved hashtags
The **Saved Hashtags** button () in the caption toolbar lets you insert pre-built hashtag sets with a single click — useful for saving favorite hashtags and reusing them across composer sessions.
### Emoji picker
Click the emoji icon () in the caption toolbar to open the emoji picker and insert an emoji at the cursor position. The picker works in both the baseline caption field and individual platform caption fields.
## Thumbnail selection
The thumbnail rail on the left of the composer allows you to set a thumbnail for your video.
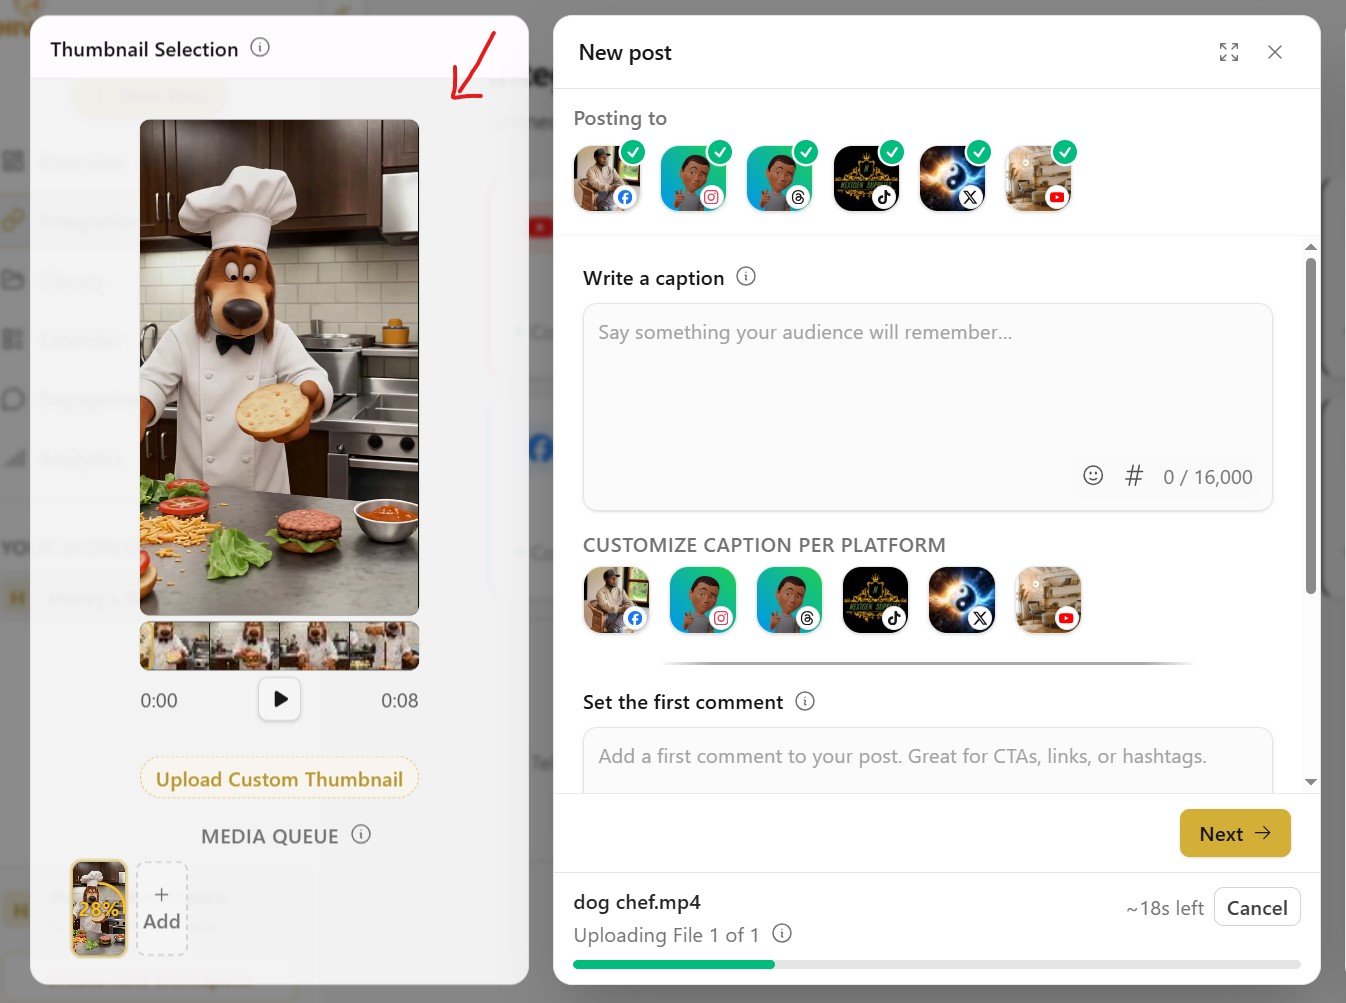 You can:
* Let Hivra use the video's first frame as the default cover.
* Scrub through the video's timeline to pick a specific frame.
* Upload a custom image to use as the thumbnail.
The thumbnail you select will be used for all selected platforms that allow setting a video thumbnail.
## Platform-specific settings
Open any platform drawer to access settings that apply only to that platform:
Set visibility, configure interaction controls (comments, duets, stitch), and toggle the **disclosure** switch to mark your video as containing paid promotion or branded content, as required by TikTok's guidelines. Failing to disclose when required may result in TikTok restricting the post.
Set the video's title (Required), configure visibility (public, unlisted, etc.), and optionally assign the video to one or more **playlists** from the YouTube settings modal. The playlist list pulls from your connected YouTube channel, so you need an active YouTube connection for this option to appear. You may also disclose if your video is intended for kids, as required by YouTube.
Add **collaborators** and tag people from the Instagram modal. Invited collaborators must accept before they appear as co-authors on the published Reel.
Set the **reply audience** — choose who can reply to the post (everyone, accounts you follow, or mentioned accounts only).
Choose whether to publish as a regular Reel or as a **Facebook Story** format. The Story format has different aspect ratio and duration constraints, so make sure your video is sized appropriately.
Set who can reply to your post on X (everyone, accounts you follow, etc.).
## Choosing a publish mode
At the last step of the Composer, choose one of three actions:
Click **Publish now** to send the job to every selected platform immediately. Hivra begins publishing as soon as you confirm. You can watch progress in the upload dock and then track the final status in the **Library**.
Click **Schedule** to open the calendar and time picker. Select a future date and time, click **Done**, and the job enters **Scheduled** state in the Library. Hivra will publish automatically at the chosen time — you do not need to be logged in. See [Scheduling](/publishing/scheduling) for details.
Click **Submit for approval** to send the job to an Owner or Admin for review before anything goes live. The job enters **Awaiting approval** state. This mode is available on Business plan workspaces only. See [Approvals](/publishing/approvals) for details.
## Autosave and draft persistence
The Composer saves your progress to local storage automatically as you type and make changes. If you close the Composer without publishing or scheduling, the draft is preserved and stored. Drafts appear in the **Library** under the **Drafts** tab, where you can reopen them at any time.
You can:
* Let Hivra use the video's first frame as the default cover.
* Scrub through the video's timeline to pick a specific frame.
* Upload a custom image to use as the thumbnail.
The thumbnail you select will be used for all selected platforms that allow setting a video thumbnail.
## Platform-specific settings
Open any platform drawer to access settings that apply only to that platform:
Set visibility, configure interaction controls (comments, duets, stitch), and toggle the **disclosure** switch to mark your video as containing paid promotion or branded content, as required by TikTok's guidelines. Failing to disclose when required may result in TikTok restricting the post.
Set the video's title (Required), configure visibility (public, unlisted, etc.), and optionally assign the video to one or more **playlists** from the YouTube settings modal. The playlist list pulls from your connected YouTube channel, so you need an active YouTube connection for this option to appear. You may also disclose if your video is intended for kids, as required by YouTube.
Add **collaborators** and tag people from the Instagram modal. Invited collaborators must accept before they appear as co-authors on the published Reel.
Set the **reply audience** — choose who can reply to the post (everyone, accounts you follow, or mentioned accounts only).
Choose whether to publish as a regular Reel or as a **Facebook Story** format. The Story format has different aspect ratio and duration constraints, so make sure your video is sized appropriately.
Set who can reply to your post on X (everyone, accounts you follow, etc.).
## Choosing a publish mode
At the last step of the Composer, choose one of three actions:
Click **Publish now** to send the job to every selected platform immediately. Hivra begins publishing as soon as you confirm. You can watch progress in the upload dock and then track the final status in the **Library**.
Click **Schedule** to open the calendar and time picker. Select a future date and time, click **Done**, and the job enters **Scheduled** state in the Library. Hivra will publish automatically at the chosen time — you do not need to be logged in. See [Scheduling](/publishing/scheduling) for details.
Click **Submit for approval** to send the job to an Owner or Admin for review before anything goes live. The job enters **Awaiting approval** state. This mode is available on Business plan workspaces only. See [Approvals](/publishing/approvals) for details.
## Autosave and draft persistence
The Composer saves your progress to local storage automatically as you type and make changes. If you close the Composer without publishing or scheduling, the draft is preserved and stored. Drafts appear in the **Library** under the **Drafts** tab, where you can reopen them at any time.